The game is played on 18 square-shaped drilling platform sectors in a rhombicuboctahedron-type arrangement above the surface of Mitral, arranged as 8 equatorial sectors, 4 northern sectors, 4 southern sectors and 2 polar sectors.
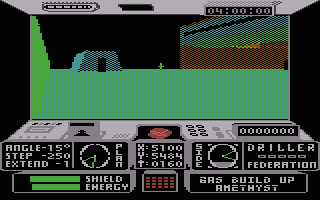
The player has two health gauges, shield and energy, each hold a maximum of 64 points each. Shields are depleted by enemy fire. Energy depletes by 1 point every minute, and is also depleted by drilling and by touching certain hazards in the game. If either gauge reaches zero, the game is over. Both can be replenished from Rubicon crystals. Shield crystals are upward facing pyramid shapes, and energy crystals are downward facing pyramid shapes. Shield and energy replenishment can also be found elsewhere in the game.
There are two vehicles in the game. The player starts in the excavation probe, which is used to place drilling rigs. A Ketar reconnaissance jet can be found and commandeered, which can fly and reach normally inaccessible areas, but it cannot place drilling rigs.
Mitral Surface
If the player exits a sector at a point where there is no adjoining sector, they will fall onto the surface of Mitral, while being shot by a laser beacon on the way down. Moving on Mitral's surface drains 2 energy+shield points per move. There is no escape from the surface of Mitral, and is effectively game over.
On the DOS version, it is possible to escape from the surface of Mitral by touching the base of the laser beacon. This puts the player in the 'unknown area' normally accessed from the Basalt sector. But if the player has previously fired weapons inside the K3-Complex and has not unlocked the Beryl-Basalt door, they will be trapped in Basalt if they are driving the excavation probe.
Skanners
Skanners are armed satellites in orbit of Mitral. Their appearance is controlled by a counter which is reset to zero whenever the player moves from one sector to another, and is incremented each time the remaining minutes indicator is decremented. When the counter reaches 8 (after 7-8 minutes) a Skanner will appear in the sky and open fire on the player. Skanners cannot be destroyed, but can be avoided by taking cover, or flying above them in the reconnaissance jet. The Skanner will disappear 1 minute later, and the counter is reset and the process repeated.
On the DOS version, skanners appear after 3-4 minutes.
On the Amiga/ST versions, skanners appear after 1-2 minutes and can be shot down for 25 points each.
Drilling scoring
The maximum points for drilling in each sector is based on a wraparound table of 18 preset values in the following fixed order:
49000, 36000, 66000, 44000, 56000, 62000, 99000, 63000, 43000, 46000, 26000, 78000, 10000, 35000, 87000, 84000, 55000, 12000
The start point of the table is chosen randomly for a new game, with the sector number minus 1 added to the table start point to retrieve the sector drilling score.
For example: if the 6th entry is set as the start of the table, then sector 1 (Amethyst) awards 62000 points, sector 2 (Lapis Lazuli) awards 99000 points etc; and sector 18 (Trachyte) awards 56000 points.
The actual drilling score is a percentage of the maximum points for that sector based on the proximity of the drilling rig to the centre of the gas pocket.
Drilling guide
The sector descriptions below include the coordinates of the 100% position for the drilling rig. The radius of the gas pocket varies from sector to sector. The player must tap at least 50% of the gas to clear the sector. Each sector description includes the 50% radius of the pocket, measured in coordinate units from the 100% point.
Drilling rigs are placed a short distance in front of the player's position. Therefore, to obtain 100% score, the player should position themselves as follows:
- The player should be facing directly north, south, east or west.
- The player's left-right position should be no more than 31 units out from the 100% point.
- The player's forward-backward position relative to the 100% point should be no closer than 353 units, and no greater than 415 units.
Note that there are two sectors (Ruby and Beryl) where it is not possible to obtain 100% score.
Placing or cancelling a drilling rig costs 5 energy points. Colliding with the lower half of a drilling rig costs 1 shield point.
In order from the start point, heading eastwards:
Amethyst
100% X-Y drilling coordinates: 6432-6432
50% radius: 960
Sector number: 1
The game begins in this sector.
There is a wall from north to south, with an archway roughly halfway. The top of the arch, followed by the two wall sections can be shot and destroyed for 250 points each.
In the southeast corner, there is a tall pillar with a platform at the top. The platform can either be shot for 1000 points, or touched with the reconnaissance jet for a full shield+energy recharge. Either action destroys the platform.
At the centre of the northern wall, there is a small cube. Shooting the cube toggles the doorway to the Obsidian sector.
There is a stores building to the south which can be entered. WARNING: shooting the stores building will destroy it!
The drilling point is marked by a cross in the northeast corner. The cross can be destroyed if shot.
On the DOS and Amiga/ST versions, the player can access the K1-Complex (normally accessed from the Topaz sector) by flying the reconnaissance jet through the window of the building suspended in the air to the west.
On the DOS version, colliding with the tall pillar awards 10 points per hit. After 240 hits, the pillar is destroyed. This does not affect the platform above.
On the DOS version, if the doorway to the stores building is shot 16 times, the player switches between the excavation probe and the reconnaissance jet. Shooting the doorway every 256 times thereafter will perform the switch again. Note that this does not change the vehicle which appears in the hangar in Aquamarine, therefore subsequently switching vehicles in the hangar may cause glitches.
Amethyst Stores:
There are four energy crystals and four shield crystals. Crystals are destroyed when shot.
Shooting the crystals on the ground replenishes 32 shield/energy points each.
Shooting the energy crystal on top of the cube replenishes 32 energy points. If instead, the cube under the crystal is shot, the cube is destroyed and the crystal falls to the ground. If the crystal is shot after falling to the ground, it fully replenishes energy and awards 2500 points.
Shooting the shield crystal on top of the cube replenishes 32 shield points, awards 2500 points and regenerates the shield crystals on the ground.
Lapis Lazuli
100% X-Y drilling coordinates: 4128-4128
50% radius: 4064
Sector number: 2
The pyramids in this sector can be shot and destroyed. The two shorter pyramids award 400 points each, and the three taller pyramids award 800 points each.
There is a wall at the eastern end of the sector. On the east side of the wall is a cube. Shooting the cube toggles the appearance of both the wall and the doorway to the Emerald sector. When this cube is shot for the first time, 1500 points are awarded.
The drilling point is at the centre of the sector. The large radius of the gas pocket makes it very easy to obtain at least 50% success.
Emerald
100% X-Y drilling coordinates: 4128-4128
50% radius: 352
Sector number: 3
There are four doorways in this sector. Each door has a laser beacon next to it, but the beacon at the Lapis Lazuli (west) door is non-functional. The lasers can be avoided by moving diagonally between the corners and the centre of the sector. Shooting the beacons has no effect.
The obelisk in the centre of the sector marks the drilling point.
Shooting the top half of the obelisk replenishes 6 shield+energy points and awards 800 points per shot. The obelisk is destroyed after 5 shots.
The obelisk base is destroyed by colliding with it. If the obelisk base is shot, the skanner counter is set to 5, causing the skanner to appear 2-3 minutes later if the player stays in the sector. If the obelisk base is shot when the skanner is already present, the skanner will remain in place for 3-4 minutes.
If the obelisk base is shot on the DOS version and the player stays in the sector, the skanner will not appear for 255 minutes, longer than the total game time. If it is shot with the skanner already present, the skanner will immediately disappear and the counter is reset.
If the obelisk base is shot in the Amiga/ST versions and the player stays in the sector, the skanner will not appear for 253 minutes. If it is shot with the skanner already present, the skanner will remain in place for 254 minutes.
Malachite
100% X-Y drilling coordinates: 5984-5408
50% radius: 768
Sector number: 4
There is a tall wall in this sector running north to south. On the western side of the wall is a large face looking towards the doorway from the Emerald sector. The eyes are laser beacons, and can be disabled by shooting the eyes. Shooting the nose will reactivate the lasers. The fangs can be shot and destroyed for 15000 points each. The mouth is a tunnel allowing passage through the wall.
The drilling point is among a group of 5 rectangular blocks in the northeast corner. The blocks can be shot and destroyed for 1500 points each. Two of these blocks obstruct the 100% point, these must be destroyed in order to obtain the 100% score.
In the air to the south is the K4-Complex, this can only be accessed with the reconnaissance jet.
K4-Complex:
Upon entering, the player is attacked by four laser beacons. These can be shot and destroyed for 15000 points each.
There is a large slab-like object, which is destroyed by shooting. This is one of two objectives required to disable the forcefield in the Ochre sector, the other objective is the small cube in the Graphite sector.
Ruby
100% X-Y drilling coordinates: 4128-2592
50% radius: 1536
Sector number: 5
While driving the excavation probe, the player must remain on the walkways, or they will fall onto the surface of Mitral.
The object in the sky is a laser beacon, which is normally deactivated. Shooting the bottom half of the beacon twice will activate the laser, and shooting the top half 12 times will deactivate the laser. Shooting each half 256 times thereafter will trigger the 'on' or 'off' event.
The drilling point is on the southern east-west walkway, in line with the beacon. The 100% point is slightly off the side of the walkway, therefore it is not possible to obtain the 100% score in this sector.
Aquamarine
100% X-Y drilling coordinates: 5152-2528
50% radius: 320
Sector number: 6
There are two hangars. The northernmost hangar can be opened or closed by shooting the doors. When the doors are shot for the first time, 75000 points are awarded. For a bonus of 10000 points, close the doors and open them again by shooting the vertical line separating the doors. The hangar contains the reconnaissance jet.
There are two arrows on the ground, one pointing south and the other pointing west. The meeting point of these two arrows is the drilling point.
To safely re-enter the Ruby sector on the walkway while driving the excavation probe, the player must be lined up with the westward-facing arrow when exiting the west side of the sector.
The doorway to the Beryl sector is closed when the game starts, it must be opened from the K3-Complex in the Beryl sector.
On the Amiga/ST versions, the other hangar is opened instead.
Beryl
100% X-Y drilling coordinates: 7136-4384
50% radius: 704
Sector number: 7
The building in the sector is the K3-Complex. The entrance is defended by a laser beacon above the entrance. On the western side of the building is a pylon with three cables attached to the building. Shoot all three cables to destroy them and disable the laser. Each cable shot awards 5000 points.
The pylon marks the 100% drilling point and cannot be removed, therefore it is not possible to obtain the 100% score in this sector.
On all other versions except the C64 and Spectrum, the 50% radius is 1024.
On the Spectrum version, the 100% point is slightly different (7200-4512) and the 50% radius is 1536.
K3-Complex:
At the top of the north wall, there are three shapes. Shooting each of these will cycle to a different shape in the following sequence: triangle->square->hexagon->triangle and repeat.
Changing all three shapes to triangles will open the doorway between the Beryl sector and the Basalt sector to the north.
Changing all three shapes to squares will open the doorway between the Beryl sector and the Aquamarine sector to the west.
Only one of the aforementioned doors can be open at a time, and will close if one of the shapes is changed.
All other combinations have no effect.
Every time the player shoots inside the complex, the exit is toggled open and closed. If the exit is closed after shooting the shapes, shoot the wall to open the exit.
WARNING: skanners can appear in this complex!
On the Amiga/ST versions (except the USA release), the shape combinations are different. From left to right: triangle-square-hexagon opens the Basalt door, and hexagon-square-triangle opens the Aquamarine door.
Skanners do not appear in the Amiga/ST versions.
Topaz
100% X-Y drilling coordinates: 3040-0992
50% radius: 4064
Sector number: 8
There is a laser beacon at the eastern end of the sector, pointing east towards the doorway to Amethyst. Therefore, if the player first enters Topaz from Amethyst, they will be fired upon. Shooting the laser beacon rotates the beacon 90 degrees to the left each time. On the first shot, 800 points are awarded.
There is a wall from north to south across the sector. At the northern end are steps for crossing the wall.
The drilling point is on top of the wall at the southern end. The 100% point is slightly off the side of the wall, but because the gas pocket radius is so wide, it is still possible to obtain 100% score.
South of the laser beacon is a platform. This is an elevator to access the K2-Complex, from which K1-Complex can also be accessed. There are two cubes on the ground to the north of the laser beacon, shoot these to operate the elevator, west cube=up, east cube=down.
On the Amiga/ST versions (except the USA release), the elevator cube functions are reversed.
K2-Complex:
Upon entering, the player is facing an object in the corner of the room. Each time the top horizontal bar of this object is shot, an energy crystal will appear, then disappear. After 5 shots, the crystal will stay in place. Shooting the crystal replenishes 47 energy points and awards 15000 points. The crystal is destroyed when shot.
Note that after the crystal appears and stays in place, if the bar is shot again without shooting the crystal, the crystal will disappear and the bar will need to be shot another 255 times before the crystal stays in place again.
There is a gap behind this object, which leads to the K1-Complex.
K1-Complex:
On the north wall are four cubes, which have the following effect when shot, from left to right:
- 1st cube = the 2nd and 3rd cubes are toggled on-off.
- 2nd cube = the 1st and 2nd cubes are toggled on-off.
- 3rd cube = the 1st, 2nd and 3rd cubes are toggled on-off.
- 4th cube = the 2nd cube is toggled on-off.
When all four cubes are eliminated, T-shaped teleporters will appear in the equatorial sectors Amethyst, Emerald, Ruby and Beryl. Touching a teleporter will transport the player to the opposite side of the planet (Amethyst <-> Ruby, Emerald <-> Beryl).
The fastest way to eliminate all four cubes is to shoot them in the following order: 4th, 3rd, 2nd.
On the Amiga/ST version (except the USA release), the cubes are in a different order: the 1st cube is moved to 4th, 2nd to 3rd, 3rd to 1st, 4th to 2nd. To eliminate all cubes, the new order is 2nd, 1st, 3rd.
On the DOS and Amiga/ST versions, the teleporters transport the player to the next eastward teleporter (Amethyst -> Emerald, Emerald -> Ruby, Ruby -> Beryl, Beryl -> Amethyst).
On the DOS and Amiga/ST versions, the player can exit the complex through the window to the Amethyst sector. If this is done while driving the excavation probe, the player will fall and die.
Each of these sectors has an impassable wall blocking the way to the Diamond sector at the south pole. On each wall, there is a switch. All switches must be turned on to access the Diamond sector.
Each switch has four indicator lights displaying the on/off status of each switch, but one has a bug (see Quartz sector).
Quartz
100% X-Y drilling coordinates: 2400-1824
50% radius: 1024
Sector number: 12
This sector is south of the Beryl sector.
There is a wall from east to west. There is a laser beacon in a gap in the wall. Above the beacon is a block suspended by a cable. Shooting the cable destroys the beacon and awards 3000 points.
On the other side of the wall, there is a cross on the ground, which marks the drilling point.
Note: there is a cosmetic bug affecting the switch indicator for the Quartz switch. The indicators for the Quartz switch in other sectors are only changed when the switch is moved from off to on. Therefore, turning the switch on will turn on the indicators in the other sectors, then turning the switch off will leave the indicators on in the other sectors, then turning the switch on again will turn off the indicators in the other sectors. This does not affect obtaining access to the Diamond sector, as it is the actual switch positions which are checked. This bug affects all formats.
Niccolite
100% X-Y drilling coordinates: 0544-2080
50% radius: 64
Sector number: 9
This sector is south of the Amethyst sector.
The drilling point is in the southwest corner. To reach it requires crossing an minefield. There are five mines on the ground. Touching one of these will instantly kill the player. Among the mines are three lasers embedded in the ground. None of these obstacles can be destroyed.
The drilling rig must be placed almost exactly on the 100% point to clear the sector.
The instruction manual included with the original Incentive Software release featured a pictogram of the game screen describing the various gauges. If the player exactly matched the in-game gauges with the pictogram gauges, they would successfully clear the Niccolite sector. Because of the extremely small gas pocket radius, this may have been intended as a form of copy protection.
Alabaster
100% X-Y drilling coordinates: 4128-4128
50% radius: 640
Sector number: 10
This sector is south of the Emerald sector.
The drilling point is in the centre of the sector, which is occupied by a swimming pool. Touching the water drains 2 energy points per move. To drain the pool, shoot the water 5 times. Each shot awards 1500 points. Shooting the water has no effect if the player is standing in the water. After the pool is drained, the basin is accessed by steps at the southeast corner of the pool.
Opal
100% X-Y drilling coordinates: 7776-7776
50% radius: 576
Sector number: 11
This sector is south of the Ruby sector.
Shooting the ground fully restores shields, with unlimited uses.
The drilling point is in the extreme northeast corner.
When all four southern switches are on, the southern wall in the Opal sector disappears, allowing access to the Diamond sector.
Note that there is a cosmetic glitch on the Plus/4 and the first C64 version: if the switch in the Opal sector is the last to be turned on, the wall does not disappear until the player moves.
The cosmetic glitch described above was fixed in the C64 USA release and the Hit Squad budget release.
On all other versions except the C64, the 50% radius is 192.
There is a bug in the DOS version which prevents placing the drilling rig exactly on the northern or eastern edges of a sector. As a result, it is not possible to obtain the 100% score on this version.
On the Amiga/ST Kixx budget release, the wall to the Diamond sector turns brown instead of black when unlocked.
Diamond
100% X-Y drilling coordinates: 4128-3104
50% radius: 1024
Sector number: 13
This sector is accessed south of the Opal sector after the switches in all four southern sectors are turned on.
As this is a polar sector, the compass is non-functional.
There is a large building in the sector. On the side facing the sector entrance is a tunnel. Above the tunnel is a laser beacon which can be shot and destroyed.
The building occupies the drilling point and must be destroyed. To do so, the player must enter the tunnel. At the end of the tunnel is a kite-shaped quad. Shoot the quad 25 times, then collide with the quad to destroy the building, which awards 500000 points.
In the far rear corners of the sector is an energy crystal and a shield crystal. Colliding with the crystals replenishes 1 shield/energy point and awards 1000 points. The crystals are destroyed after 200 hits each.
On all other versions except the C64, instead of one laser beacon on top of the tunnel, there are two laser beacons, one on each side of the tunnel. They can be destroyed the same way.
Like the southern sectors, each sector has an impassable wall blocking the way to the Trachyte sector at the north pole. Again, there are switches in these sectors, all of which must be turned on to access the Trachyte sector. But unlike the southern switches, three of the northern switches are hidden.
Basalt
100% X-Y drilling coordinates: 1312-2272
50% radius: 768
Sector number: 15
This sector is north of the Beryl sector, and is normally inaccessible by the excavation probe until the doorway is unlocked from the K3-Complex in the Beryl sector.
In the northeast corner of the sector is a stack of 5 pyramids. They can be shot and destroyed for 25000 points each. Destroying a lower pyramid will destroy the ones above it, so for maximum points, they must be destroyed from top to bottom.
The drilling point is on a raised platform in the southwest corner, which is too tall for the excavation probe. On the northwest edge of this platform is an invisible step allowing access. The player must remember to descend from the platform in the same way.
At the northern end of the sector are two walls, with a gap between them. If the player moves into the gap and collides with the western wall end-on, they will enter a hidden 'unknown area', which contains the switch.
Ochre
100% X-Y drilling coordinates: 1440-6752
50% radius: 1440
Sector number: 16
This sector is north of the Ruby sector.
The drilling point is indicated by a marker on the ground in the northwest corner. There is an invisible forcefield blocking the way, marked by posts on the east and west sides. To deactivate the forcefield, two objects elsewhere must be destroyed: the small cube in the Graphite sector, and the large slab in the K4-Complex accessed from the Malachite sector.
South of the forcefield are three lasers embedded in the ground, which can only be destroyed by a direct shot to the source of the laser. Destroying the lasers awards 25000 points each.
The switch is not hidden in this sector.
Graphite
100% X-Y drilling coordinates: 1312-6368
50% radius: 768
Sector number: 17
This sector is north of the Emerald sector.
There is a moat which crosses from east to west. Touching the moat drains 3 energy points per move. There is a narrow crossing near the eastern end.
On the other side of the moat, there is a small cube in the northeast corner. Collide with the cube to destroy it. This is one of two objectives required to disable the forcefield in the Ochre sector, the other is the large slab in the K4-Complex accessed from the Malachite sector.
In the northwest corner is a suspended platform which blocks the drilling point. It can only be removed by colliding with it with the reconnaissance jet.
In the centre area, there are two objects on the ground: a triangular object and a U-shaped object. These form a set of iron sights when viewed in a line northwards. The player must line up the sights and then shoot the north wall behind the sights. If done correctly, the switch will appear and 50000 points are awarded.
Obsidian
100% X-Y drilling coordinates: 6688-6688
50% radius: 2560
Sector number: 14
This sector is north of the Amethyst sector, and is normally inaccessible by the excavation probe until the doorway is unlocked from the Amethyst sector.
Near the doorway are two laser beacons, which can be shot and destroyed for 800 points each.
There is a trench running from east to west. It can be crossed by knocking over a tall object at the eastern end, forming a bridge. The object can be knocked over either by shooting or a collision. If shot, 1500 points are awarded; if collided with, 2500 points are awarded.
Shooting the ground on the southern side of the trench replenishes 24 shield points, with unlimited uses.
In the trench are four pyramids, these can be shot and destroyed for 1000 points each.
There is a stores building in the northwest corner. There are two entrances, a front door and a hidden back door.
The drilling point is in the northeast corner, near the north side of the trench crossing.
The switch in this sector will only appear after 17 sectors have been cleared (all except Trachyte). When the switch appears, the number 17 will disappear from the north wall.
When all four northern switches are on, the northern wall in the Obsidian sector disappears, allowing access to the Trachyte sector.
On all other versions except C64 and DOS, the 50% radius is 4064.
Shooting the southern ground to replenish shields does not work on the Spectrum version.
Obsidian Stores:
If entering by the front door, the player will be attacked by a laser beacon, which can be shot and destroyed.
There is a shield crystal and an energy crystal, which can be shot for 7500 points each and replenishes 32 shield/energy points.
Shooting the lights on the ceiling will result in darkness.
It is not possible to exit by the back door, so if the player entered from there, they should remember to destroy the laser beacon before attempting to leave.
Trachyte
100% X-Y drilling coordinates: 4128-6944
50% radius: 192
Sector number: 18
This sector is accessed north of the Obsidian sector after the switches in all four northern sectors are turned on.
As this is a polar sector, the compass is non-functional.
There is a large structure at the far end of the sector, which obstructs the drilling point. The structure consists of a frame and five segments: four spokes and a hub. Shooting the segments or the ground, as well as moving along the ground, affects whether segments appear or disappear. All five segments must be eliminated to destroy the structure, which awards 1000000 points.
When the player first enters the sector, the upper & lower spokes and the hub are on, and the left & right spokes are off.
These actions have the following effects:
- Shooting the upper spoke: turns on the lower spoke and toggles the appearance of the left spoke.
- Shooting the lower spoke: turns on the right spoke and toggles the appearance of the upper spoke.
- Shooting the left spoke: turns off the left spoke and turns on the hub.
- Shooting the right spoke: turns off the hub.
- Shooting the hub: turns off the upper & lower spokes and toggles the appearance of the left spoke.
- Shooting the ground: turns off the left & right spokes.
- Moving: toggles the appearance of the upper & left spokes.
Assuming the structure is in it's original state (upper & lower spokes on, hub on, left & right spokes off), then without moving, shoot the segments in the following order to destroy the structure: lower spoke, hub, right spoke, then shoot the ground.
There is an invisible wall from left to right blocking the way to the drilling point. There is a very small gap in the wall at X-coordinates 6272 to 6335.
If the game is completed while in the Trachyte sector, the full ending is shown. If the game is completed in any other sector, it goes straight to the end screen. This happens on all formats.
|