|  Bard's Tale III Bard's Tale III | | Title: | Bard's Tale III | | Category: | Game/RPG | | Release Date: | 1990 | | Language: | English | | Size: | 64K | | Device Req.: | Disk only (4 sides) | | Machine: | PAL Only | | Code Type: | Machine code | | Distribution: | Freeware | | Game ending type: | Has an end, game ends | | |  | | Converted by: | Pigmy | | Re-released by: | Csory | | Additional code by: | Ceekay | | Credited (Additional code by): | siz | | Notes: | AKA BT3, The Bards Tale 3, The Bard's Tale 3: The Thief of Fate. A large scale RPG and conclusion of the Bard's Tale series. Gather an adventuring party and go on an epic quest to destory Tarjan, the Mad God before he destroys the world. |
Download:
Ceekay 1551 version:
Csory version (1551 fixed + Csory's 256K):
Disk 1a:
Disk 1b:
Disk 2a:
Disk 2b:
External links:
C64 release
Amiga release
User Rating: 9.4/10 (15 votes)
| 
 |
|
| |
|  Effects Effects | | Part | Effect name | Parameters | Notes |
| 256k Support | | Csory version with Csory's 256K memory expansion. |
| |
|  Controls Controls | In all menus, use first letter of the available options and enter.
J : Turn Left
I : Forward
K or Return : Forward and enter building
L : Turn Right
B : Bard song
C : Cast a spell
D : Drop member
N : New order of party members
P : Party attack
S : Save game
U : Use an item
V : Volume - music on/off
W : Use portal down (when there's a portal below you)
E : Use portal up (when there's a portal above you)
/ : Automap
1-7 : View party members
Shift + 1-7: View party members (without loading their picture)
Cursor up: Slower text scrolling during combat (default)
Cursor down: Faster text scrolling during combat
Cursor left: Pause game
|
| |
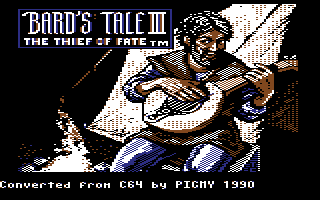
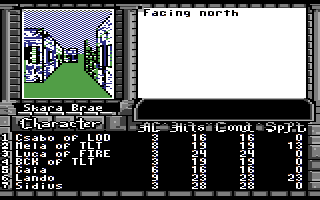
|  Image Gallery Image Gallery | 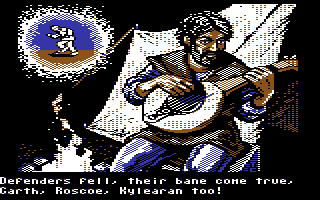 Game intro 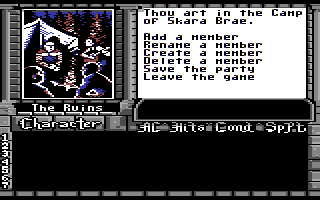 Character screen 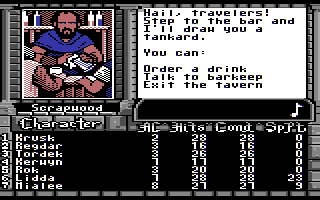 Scrapwood Tavern 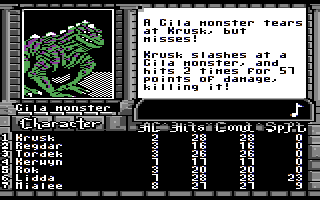 Fighting a Gila Monster  Skara Brae ruins 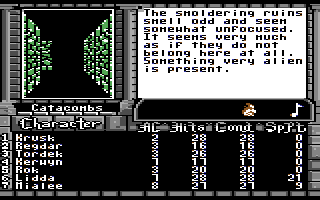 Catacombs
|
| |
|  Spell List Spell List | Conjurer Spells:
| Level 1: | MAFL | 2 | View Medium | Mage flame - A small flame floats above the spellcaster as he moves about, illuminating the immediate area. | | ARFI | 3 | 1 Foe/10' N/A | Arc Fire - Fiery blue flames spray from the spellcaster's fingers, inflicting 1 to 4 damage points, depending on the Conjurer's level. | | TRZP | 2 | 30' N/A | Trap Zap - Disarms any trap within 30 feet in the direction that the spellcaster is facing. Trap Zap also works on chests for the same amount of spell points. | | Level 2: | FRFO | 3 | Group Combat | Freeze Foes - Binds your enemies in a magical force, slowing them down and making them an easier target for your itching sword. | | MACO | 3 | N/A Medium | Kiel's Magic Compass - A compass of shimmering magelight appears above the party and shows the direction they face. | | WOHL | 4 | Char N/A | Word of Healing - With the uttering of a single word, this heals a party member from 4 to 16 points of damage. | | Level 3: | LERE | 5 | View Long | Lesser Revelation - An extended Mage Flame spell that also reveals secret doors. | | LEVI | 4 | Party Short | Levitation - Partially nullifies gravity, letting the party float over traps, or up and down through portals. | | WAST | 5 | Group/20' N/A | Warstrike - An electric spell where a stream of energy shoots from the spellcaster's finger, frying a group of foes for 5 to 20 damage points. | | Level 4: | INWO | 6 | Party N/A | Elik's Instant Wolf - Summons a giant and extremely fierce wolf to join your party. | | FLRE | 6 | Char N/A | Flesh Restore - A powerful healing spell that restores 10 to40 points to a party member, curing those stricken with insanity or poisoning. | | Level 5: | GRRE | 7 | View Long | Greater Revelation - Operates like Lesser Revelation, but illuminates a wider area for a longer period of time. | | SHSP | 7 | Group/30'/(N/A) | Shock Sphere - Creates a large globe of intense electrical energy that envelops a group of enemies and inflicts 10 to 40 damage points. | | Level 6: | FLAN | 9 | Group N/A | Flesh Anew - Works like Flesh Restore, but affects every member of the party. | | | MALE | 8 | Party Indef | Major Levitation - Operates like Levitation, but it lasts until the spell is terminated by some event like the activation of an anti-magic square. | | Level 7: | REGN | 12 | Char N/A | Regeneration - A health spell that revives all the hit points for one lucky member of the party. | | APAR | 15 | Party N/A | Apport Arcane - Teleports the party within a dungeon to any location that's not protected by a teleportation shield. | | FAFO | 18 | Group N/A | Far Foe - Pushes a group of foes 40 feet further away from your party, up to a total distance of 90 feet. | | INSL | 12 | Party N/A | Elik's Instant Slayer - Materializes a slayer who joins your party. What's a slayer? The name speaks for itself... |
Magician Spells:
| Level 1: | VOPL | 3 | Char Combat | Vorpal Plating - Causes the weapon (or hands) of a party member to emit a magical field that inflicts 2 to 8 points of additional damage. | | QUFI | 3 | Char N/A | Quick Fix - Regenerates 8 hit points for a character, up to the character's maximum hit point level. | | SCSI | 2 | Party N/A | Scry Site - Causes a dungeon wall or wilderness pathway to reveal the party's location. | | Level 2: | HOWA | 4 | 1 Foe/10' N/A | Holy Water - Holy water sprays from the spellcaster's fingers, inflicting 6 to 24 points of damage on any foe of evil or supernatural origin. | | MAGA | 5 | Char Combat | Mage Gauntlets - Makes the hands (or weapon) of a party member more deadly by adding 4 to 16 points of damage to every wound it inflicts on a foe. | | AREN | 5 | 30' Short | Area Enchant - Causes the dungeon walls within 30 feet (3 squares) of a stairway to call out if the party is headed towards the stairs. | | Level 3: | MYSH | 6 | Party Medium | Ybarra's Mystic Shield - Causes the air in front of the party to form an invisible shield that's as hard as metal. The shield moves with the party. | | OGST | 6 | Char Combat | Oscon's Ogre Strength - Endows a specific party member with the strength of Elik's Ogre for the duration of the battle. | | STFL | 6 | Group/40'/(n/a) | Star Flare - An electrical spell that ignites the air around your enemies, scorching them for 10 to 40 damage points. A real hair curler. | | Level 4: | SPTO | 8 | 1 Foe/70' N/A | Spectre Touch - Drains a single enemy of 15 to 60 hit points as if it were touched lightly by death. | | DRBR | 7 | Group/30' N/A | Dragon Breath - Lets the spellcaster belch a breath of fire at a group of monsters, inflicting 8 to 64 points of damage on each monster. | | Level 5: | ANMA | 8 | Party Combat | Anti-Magic - Causes the ground to absorb a portion of the spells cast at the party by monsters, giving the party a chance to escape unharmed. This spell also aids in disbelieving illusions and shielding against magical fires such as Dragon Breath. | | GIST | 10 | Party Combat | Giant Strength - Instills tremendous power in your party, increasing their strike ability by 10. | | Level 6: | PHDO | 10 | Wall 1 Move | Phase Door - Vaporizes any wall that's not protected by an Anti-Phase Door aura or spell into air. | | YMCA | 10 | Party Indef | Ybarra's Mystical Coat of Armor - Works just like Ybarra's Mystic Shield, but lasts indefinitely. | | Level 7: | REST | 25 | Party N/A | Restoration - Regenerates the body of every party member to perfect condition; even cures insanity or poisoning. | | DEST | 16 | 1 Foe/10' N/A | Death Strike - Instantly kills a selected enemy, which certainly categorizes this spell as one that doesn't fool around. | | ICES | 11 | Group/50' N/A | Ice Storm - Pummels a group of monsters with chunks of ice, causing 20 to 80 points of damage. | | STON | 20 | Char N/A | Stone to Flesh - Takes a character who has been turned to stone and restores him to his natural flesh state. |
Sorcerer Spells
| Level 1: | MIJA | 3 | 1 Foe/40'/ì | N/A | Mangar's Mind Jab - Casts a concentrated blast of electrical energy at one opponent, inflicting 2 to 8 points of damage for each experience level of the spellcaster. | | | PHBL | 2 | Party | Combat | Phase Blur - Causes the entire party to become blurry in the eyes of the enemy, making your party tougher to strike. | | | LOTR | 2 | 30' | Short | Locate Traps - Heightens the spellcaster's awareness for trap detecting. Works for 30' in the direction that the spellcaster is facing. | | Level 2: | DISB | 4 | Party | N/A | Disbelieve - Reveals an attacking illusion for the true nonphysical object that it is, causing it to vanish. | | | WIWA | 5 | Party | N/A | Wind Warrior - Creates the illusion of a battle-ready ninja in the ranks of your party. The illusionary ninja will fight until defeated or disbelieved. | | | FEAR | 4 | Group | Combat | Word of Fear - An incantation that causes a group of enemies to quake in fear, thus reducing their ability to attack and inflict damage. | | Level 3: | WIOG | 6 | Party | N/A | Wind Ogre - Like Elik's Instant Ogre, it summons a mean, illusionary ogre to join your party. | | | INVI | 6 | Party | Combat | Kylearan's Invisibility Spell - Invoke this spell to render the entire party nearly invisible to the enemy. | | | SESI | 6 | 30' | Medium | Second Sight - Heightens awareness so the spellcaster can detect all traps and tricks that lie directly ahead. | | Level 4: | CAEY | 7 | View | Indef | Cat Eyes - Endows the entire party with perfect night vision for an indefinite period of time. | | | WIDR | 12 | Party | N/A | Wind Dragon - Creates an illusionary red dragon to join the ranks of your party. | | Level 5: | DIIL | 8 | All Foes | Combat | Disrupt Illusion - Destroys any illusions among the ranks of the enemy and prevents new illusions from appearing. | | | MIBL | 10 | All Foes/30'/ì | N/A | Mangar's Mind Blade - An electric spell that strikes every opposing group within range with an explosion of energy capable of inflicting 25 to 100 points of damage. | | Level 6: | WIGI | 11 | Party | N/A | Wind Giant - Creates an illusionary elemental giant that joins your party and fights up a storm. | | | SOSI | 11 | 30' | Indef | Sorcerer Sight - Operates like the trap-detecting Second Sight spell, but lasts indefinitely. | | Level 7: | RIME | 20 | All Foes/40' | N/A | Rimefang - Rakes enemies with shards of ice, inflicting 50 to 200 points of damage. | | | WIHE | 16 | Party | N/A | Wind Hero - Creates an illusionary hero with the power of hurricane winds to join your party. | | | MAGM | 40 | Group | N/A | Mage Maelstrom - Assaults a group of opposing spellcasters and may do one of the following: inflict 60 to 240 points of damage, turn them to stone, or kill them outright. However, because the maelstrom is illusionary in nature, a disbelieving enemy can totally nullify it. | | | PREC | 50 | All Foes | N/A | Preclusion - Keeps the enemy from being able to summon any creatures. |
Bard Songs
| Song | Non-combat effect | Combat effect | | Sir Robin's Tune | Run away from attackers as long as the combat has not yet begun | Prevent monsters from calling for additional help | | Safety Song | Creates an anti-monster aura (no random attacks) | N/A | | Sanctuary Score | Lowers the party's AC (up to a maximum of 15 points) | Lowers the party's AC (up to a maximum of 15 points) | | Bringaround Ballad | Rejuvenate the Bard's HP | Rejuvenate everyone's HP | | Rhyme of Duotime | Regenerates the mage's spell points | Gives the party an extra attack | | Watchwood Melody | This creates light so you can find your way around. May even work in anti-magic zones. | N/A | | Kiel's Overture | Calls up a compass so you can get your bearings | Casts the monster-frying Trebuchet spell for one round | | Minstrel Shield | Lowers the bard's AC | Partially shields your party so they only take half damage from monster attacks |
|
| |
|  Items Items | * Armors:
Robes: AC -1
Leather Armor: AC -2
Chain Mail: AC -3
Mthr Bracers: AC - 3 (for mages)
Scale Armor: AC -4
Plate Armor: AC -5
Mthr Scale: AC -5
* Helmets:
Helm: AC -1
Mthr Helm: AC -2
* Gloves:
Leather Gloves: AC -1
Gauntlets: AC -1
* Shields
Buckler: AC -1
Tower Shield: AC -2
|
| |
|  Walkthrough Walkthrough | Part 1: Skara Brae
- You start in the refugee camp. Assemble a party and leave the camp. One note about party composition: it's not possible to complete the game without a rogue in the party.
- In the wilderness, you can find the Scrapwood Tavern. Your bard can drink here (to replenish his or her songs), and you can get the following clues from the barkeep (depending on the gold you tip him):
1 - 49: "There's a building in Skara Brae where some of the survivors stashed their goods. It may be helpful."
50 - 249: "Be on the lookout for the magic gems, you're(SIC) spellcasters will need them."
250 - 499: "There lies another bar in Celaria Bree, seek it. It exists only in the dimension called Lucencia."
500 and up: "Seek out the old man in the Review Board. He keeps watch over everything."
- You can also find a small Shrine in the wilderness. Here, like in all temples, you can have your characters healed for gold.
- Find the ruins of Skara Brae, and go to the review board (in the north-east of the ruins). The old man will give you all your quests and you can level up and learn spells here.
Your first quest: kill Brilhasti ap Tarj ("ap" means "son of" in Gaelic, so the name would mean "Brilhasti, son of Tarj(an)"):
"Yes, you are the prophesied ones, but you have come too early. No matter.
Beneath Skara Brae you will find one of Tarjan's devotees. Brilhasti ap Tarj is a foul Necromancer, and his life impedes my efforts to stave off disaster.
You may enter the Catacombs under the Mad God's Temple by uttering his master's name... 'Tarjan'
Destroy Brilhasti ap Tarj, then return to me for your true quest."
- Enter the Temple of the Mad God and say the name the old man gave you (Tarjan). This allows entry to the Catacombs (2 levels).
Clear out the 2 levels of the catacombs to find the following clues:
"The priests seek another word..." "...this word will allow access to the unholy domain of Brilhasti ap Tarj" "Written in blood are large letters which spell out CHAOS."
- Enter the Temple of the Mad God again, and say CHAOS. This allows entry to Unterbrae (4 levels).
On Level 1, you find the following two clues: "The tint of melancholy paves the way." / "A splash of a noble's blood colors the exit." Before the stairs down, you must answer this riddle: "Speak the rhyming words to pass through!" The answer to all of these is BLUE.
On Level 2, you find the following clue: "Light hurts me and bleeds me, but leaves me behind it always." Before the stairs, a faded figure asks you this riddle: "I am nothing, I make nothing, but my opposite creates me even as it destroys me. What am I?" The answer is SHADOW.
On Level 3, you are asked the following riddle: "I have no lips, yet my kiss is deadly. I am not a razor, but those I caress need never shave again. Your best friend, I will kill you." The answer is SWORD.
On Level 4, you must pass through three wards. At the end of the level you find Brilhasti. Once killed, the party teleports back to in front of the Review Board.
- The old man gives you 600,000 XP for killing Brilhasti. (You receive the same amount for completing all quests.) He the gives you your next quest:
"Welcome ye children of the prophecy. Upon your shoulders falls a great weight, for you must embark on what will be your greatest adventure ever."
"That which has laid waste to Skara Brae is an ancient evil recently released. It threatens to destroy all reality and time as it has wrought havoc on Skara Brae."
"If you cannot stop it, it will consume the universe. If you do stop it, you will be rewarded beyond all your dreams."
"Prepare thyselves, and hasten to the place of trees, for it is most like the first dimension you must sojourn in to blunt evil."
"Arboria, the home of Valarian the bold, is reached through using powerful magic that only a Chronomancer can control."
"Bring to me Valarian's Bow and The Arrows of Life if Valarian will not return here with you."
"Yes, and be on the lookout for an ally, for you are not the first I have sent on this quest. Though your paths are different, they may cross, and you will do well together."
- You must change the class of one of your spellcasters to Chronomancer. The old man teaches you the ARBO spell.
Part 2: Arboria
- In the wilderness, find the Twilight Copse, then cast ARBO. If your game does not have the copy protection removed, you may have to use a code wheel (like this one). You arrive in Arboria.
- Go to Cierra Brannia, the only city in Arboria. It's safe, there are no random encounters here. You can level up, find a temple for healing. There are two taverns, Hic Haven and Stagger Inn. They both provide the same clues (based on the gold tipped to the barkeep):
1 - 49: "Ack! It's not just a word, but a state of mind."
50 - 249: "Be on the lookout for the magic gems, you're(SIC) spellcasters will need them."
250 - 499: "There lies another bar in Celaria Bree, seek it. It exists only in the dimension called Lucencia."
500 - 999: "Go to the bard's hall and listen to the songs they sing. They contain useful information."
1000 and up: "There is said to be a key existing in the Violet Mountains, this will gain access to Cyanis's Tower."
- Talk to the King, he gives you a quest: kill Tsoltha Garnath in the Festering Pit. He can only be killed by the Nightspear, which is at the top of Valarian's Tower. To get there, you will need two more items: the water of life and an acorn.
- Find the acorn in Arboria, then visit the Fisherman's Hut. The fisherman will teach you the GILL spell for 1,000 gold (the Wizard's Guild teaches the same spell for 10,000 gold). The entrance to the Underwater Palace is right next to the hut.
- Make sure you have a container before entering. Since this area is underwater, you will quickly start drowning (losing HP). You have 3 options:
* Try to do the area quickly while healing your characters (not recommended)
* Pick up some Arefolia leaves laying around, which cast the GILL spell upon use (free)
* Cast GILL (which allows the party to breathe underwater) if you purchased the spell
- Inside the palace find the water of life, and fill a container (wineskin, etc), then leave.
- Go to Valarian's Tower and climb to the 3rd level. You will find a stone block in your way. Use the acorn (which gets planted), then use the Water of Life. This makes the acorn grow and lifts the stone out of your way. You can now reach the 4th level. At the north-east corner you will find the Nightspear: "Hidden away in this secret closet you see the gleaming Nightspear. No lights reflect from it, and the black metal looks like a slice from the starry night sky". Leave the tower.
- You will find a deep pit near the city. Enter the Festering Pit. You will find Tsoltha Garnath in the north-west corner of the second level. The Nightspear just needs to be anywhere in your inventory to prevent him from regenerating. Once killed, the party will pick up his head and heart. Leave the pit and return to the King.
- Talk to the King, who thanks you and now grants access to the Sacred Grove. You can find the entrance here in Cierra Brannia. This is the final level in Arboria. Find the Tomb. At the entrance, there's a bowl with tubes attached. Place Tsoltha's heart in it, then use the Water of Life. This starts the heart which pumps blood into the tubes, opening the Tomb's door. Enter the tomb and pick up Valarian's Bow and the Arws of Life. Leave the grove, then the city. Return to the entrance of Arboria and case ENIK. See the old man, who will give you your next quest: bring the Wand of Power and the Sphere of Lanatir back from Gelidia. You receive 600,000 XP.
- Leave Skara Brae and find the Cold Peak. Cast GELI with your Chronomancer to go to Gelidia.
Part 3: Gelidia
- The outside is cold and soon you start freezing (losing HP). You can visit the small hut, where you will find Alendar frozen to death, and his diary, explaining the backstory of what happened to Gelidia. Find the Keep and enter, you arrive in the south-west corner. Each of the other three corners have a passageway blocked by a riddle. Solve them to gain entry to each of the Keep's towers. They are (in increasing difficulty): white, gray and black. The towers can be cleared in any order.
- North-east (White tower):
"Lift the veil, (Levitation - LEVI)
Then counter it, (Anti Magic - ANMA)
False door frees, True door." (Phase Door - PHDO)
Cast the three spells to open the passageway to the White Tower.
- You can climb the stairs to the 4th level immediately. Here you will find the guardians of the White Tower, 6 White Mages. Kill them and collect the Crystal Lens. Climb back down to the Ice Keep and head to the north-west corner.
- North-west (Grey tower):
"Wolf to sate hunger, (Elik's Instant Wolf - INWO)
A hero true, but not one at all, (Wind Hero - WIHE)
Focus its attention, (Fanskar's Force Focus - FOFO)
but better not to be see at all." (Kylearan's Invisibility Spell - INVI)
Casting the wrong spells has no penalty. Casting the correct spells opens the passageway to the Grey Tower.
- Climb to the 4th level. Here you find the following clue: "Broken cross is the goal, yet hidden it doth be. Through the flaw egress is won, but peril is not lost. Win the lens, one third your prize, but at what cost?" The "broken cross" refers to the unreachable cross-shaped area, you must cast APAR to reach it. Here you will find the guardians of the Grey Tower (boss fight), 7 Grey Mages. Once killed you will find the Smokey Lens. Climb down to the Ice Keep, and head to the south-east corner.
- South-east (Black tower):
"Bright light, (Mage Flame - MAFL)
Loud thunder, (Shock Sphere - SHSP)
Whispered terror term, (Word of Fear - FEAR)
Flaming guide to lead the way, (Summon Elemental - SUEL)
Join the wall, (Baylor's Spell Bind - SPBI)
The no one will be the wall."
- Climb to the 4th level, find the guardians. They are 5 Black Wizards, watch out for their stoning spell. Once killed, pick up the Black Lens.
- With all 3 lenses collected, return to the Ice Keep. Head to north middle (N9 E5) to find a white marble slab with three circles (crystal, smokey and black). Use each of the lenses, which causes the slab to move aside and reveal stairs down. Take them to enter the Ice Dungeon.
- On the first level, make your way around to the stairs at the north-east corner and head down. On the second level, you find a blocked door: "A sign reads: Here lies Lanatir, last guardian of all magics. Only in the name of his blood may you enter." The solution to this is mentioned in the official Clue Book: "Cala was Lanatir' s daughter. Utor was certainly the son of Cala and Hawkslayer." Nothing happens if you enter the wrong answer. Enter CALA or UTOR, then pick up Lanatir's Wand of Power and the Sphere of Lanatir.
- You can now leave the Ice Dungeon, then the Keep, return to the well worn ground and cast ECUL. Return to the old man at the review board, who gives you your next quest: you must go to Lucencia, and get the Crown of Truth and the Belt of Alliria. You receive 600,000 XP.
Part 4: Lucencia
- Leave Skara Brae and go to the crystal springs. Cast LUCE to teleport. Go to the city, Celaria Bree. The tavern is called "Cheers", and the barkeep provides the exact same clues as both bars in Arboria:
1 - 49: "Ack! It's not just a word, but a state of mind."
50 - 249: "Be on the lookout for the magic gems, you're(SIC) spellcasters will need them."
250 - 499: "There lies another bar in Celaria Bree, seek it. It exists only in the dimension called Lucencia." (This is particularly useless, since this is the very bar being mentioned.)
500 - 999: "Go to the bard's hall and listen to the songs they sing. They contain useful information."
1000 and up: "There is said to be a key existing in the Violet Mountains, this will gain access to Cyanis's Tower."
- Have your bard learn Kiel's Overture for 30,000 gold at the Bard's Hall. You can listen to the other bard songs for clues as well. Have the spellcasters learn Divine Intervention (DIVA) for 50,000 gold at the Wizard's Guild.
- Leave the city and go to the Violet Mountain. Make sure you have a canteen before you enter! Climb up to enter the dungeon. (The name suggests the color, and the dungeon entrance has a nice description of how the walls are purple - but alas it's the same blue/green dungeon set.) Make your way around the first level to the stairs in the middle, and climb up. Make your winding way to the south-middle of the dungeon to find the Rainbow Dragon. It isn't particularly hard. Once killed, you will find the Crystal Key. Use a canteen to collect some of the dragon's blood. Leave the mountain.
- Head to the decrepit tower and enter it. You are in Cyanis' Tower. At the entrance you find a wall with a small keyhole - use the Crystal Key. The door is now open. Make your way to the 3rd floor to find Cyanis - crying in a corner. The clue book mentions that you should heal him. Casting REST will work. This helps him come to his senses. He gives you a triangle needed to enter his beloved Alliria's tomb. Head down and leave the tower.
- To get the two items from Alliria's tomb, you will need 5 roses, so make sure you have 5 empty inventory slots. You can collect them in any order, they are found in the wild around Lucencia: Blue Ross, Red Rose, White Rose, Yellow Rose. You find a bush behind the city that has no flowers; use the dragon's blood, which will "have a strange effect on the rosebush". You can now pick up the Rainbow Rose. With all 5 collected, you can head to Alliria's tomb.
- Enter the tomb and make your way to the north-middle. Here, a large black crystal is blocking the way. Use the triangle (it doesn't have to be done by a bard), which shatters the crystal. You can now go north and take the stairs up to the 2nd and final level.
- Here, Alliria's ghost will appear 5 times and ask you for specific flowers. The clues to the colors are given in the bard's song. In order, they are:
Flower of Truth: White Rose
Flower of Valor: Blue Rose
Flower of Kinship: Red Rose
Flower of Nature: Yellow Rose
Flower of Alliria: Rainbow Rose
Giving the wrong color doesn't let you pass, but there are no other ill effects other than the item being lost. After giving the correct flowers, you find her tomb, and you will pick up the two items (crown and belt).
- Navigate out of the tomb, find the well worn ground and teleport back with ILEG. Return to the old man, who gives you your next quest and 600,000 XP. (If you haven't already done so, you can drop the Magic Triangle and Crystal Key, they are no longer needed.)
Part 5: Kinesia
- The quest is: "You must return here with The Hammer of Wrath and Ferofist's Helm. I know Ferofist yet lives, but I cannot be sure of how long he will survive. Hurry, the pace quickiens, and the outlook is horrible if you fail!"
- In the wilderness, head to the Old Dwarf Mine and cast KINE. (Dungeon Disk Side B... Here we go!) You arrive in Ferofist's Palace. You immediately meet Hawkslayer (he's younger), who says: "The old one said I'd find allies, but I don't work with just anyone. I only want smart allies. Answer this riddle: Colder than myself, I cover myself with myself, and shrink so I can grow large again. What's the answer?" (Iceberg). You don't have to have him join. Ferofist, the dwarven god, created Urmech, a mechanical man, who then rebelled. The place is now overrun with lots more mechanical enemies.
- From the palace, there are 3 passageways leading out. Head to the south one first, to the Barracks. In the south-east corner you will find the Right Key.
- Head to the east passageway to Ferofist's Private Quarters. If you like, at the north-west corner, you can meet Ferofist. He asks you to get both keys, go through the workshop and destroy Urmech. He provide this clue:
"Bright hand, true hand, Thine are the months of six summers.
Sinister hand, Dark hand, Three plagues upon each finger.
In opposition, you ward the lair of my foolish death."
(One summer is 3 months, 6 summers is 18 months for the (b)Right hand, 3 plagues * 5 fingers = 15 times for the Left hand.)
- Get the Left Key from the east middle.
- Head north and take the passageway to the Workshop. Go north twice and west four times to find the sealed portal in the floor. It's secured by two locks. You must use each key, the game will ask you how many times you will turn them. Turning the keys the wrong times has no effect. Turn the right one 18 times and the left one 15 times to open the passageway down. (You can discard both keys now.)
- You arrive in Urmech's Paradise. You can either go around, the entrance to the inner area is at the north, and then head south to the south-most cross-shaped area to find the portal down; or simply teleport 3N. You can see that the level below is filled with liquid. Go down the portal.
- You arrive at the Viscous Plane, filled with oil. Casting GILL will help you breathe. You cannot teleport, but you can use PHDO. Go to the south-west corner and swim through the opening.
- You arrive at the Sanctum. You can teleport here but you can't use phase door. Find the door at the north and head south to meet Urmech. You have a choice: fight him or work out an accommodation. If you make peace with him, he will offer you to turn one or more characters into Geomancers. You don't be able to do this if you kill him. Pick up the helm and the hammer then leave: go up to the workshop, south to the palace, return to the well worn ground and cast ????. The old man gives you 600,000 XP and gives you your next quest: get Sceadu's Cloak and the Helm of Justice from Tenebrosia.
Part 6: Tenebrosia
- Go to Shadow Rock and cast OLUK. (Starting with this one, the teleport spells are no longer the first four letters of the destination.) You arrive in Tenebrosia, also known as "Nowhere". The town of Black Scar is immediately visible to the east, go there. There are random encounters here. The taverns (all named simply Tavern) provide the following clues:
1 - 49: "Be on the lookout for the magic gems, you're(SIC) spellcasters will need them."
50 - 249: "Seek out the old man in the Review Board. He keeps watch over everything."
250 - 499: "Seek Werra in Tarmitia."
500 - 999: "The key to finding Sceadu is finding the lock."
1000 and up: "Sceadu can be found in the middle of Nowhere."
- Visit the Bard's Hall, where you can learn the 8th and final Bard Song called Minstrel Shield for 60,000 gold. Visit the wizard's guild where you can buy a new spell, Gotterdamurung (NUKE) for 50,000 gold.
- As spelled out in the clue book (and hinted by the barkeep), in order to get to Sceadu, the party will need a Shadow Door, and a Shadow Lock. The Shadow Door is in the Dark Copse, but in order to get to it, you will need to burn away some trees using tar. The first stop is the Tar Pit. Walk to the middle area, and use a container to fill it up with tar. You can now leave.
- Now head to the Dark Copse (6S 7W). Walk near the middle, where you'll see something on the ground, surrounded by trees on all sides. Use the tar you collected, which ignites the tree into a fury of flames! (Unfortunately you won't be able to use the tar anywhere else.) Amid the ashes of the burned forest, a black door rests on the soot and appears to have no real form. You now have the shadow door! Leave the copse.
- Go to the canyon. There's an area in the middle with no entrance, but with one square "going into" it. Cast PHDO or WAWA at that point to enter. Inside you'll find the Shadow Lock "a lock that looks more like a shadow than anything real". You can now leave the canyon.
- Go to the middle of nowhere (literally the middle of the map), and use the Shadow Door, then the Lock. This opens a hole in the ground, jump in and you find yourself in Sceadu's Demens.
- On the first level, the spot leading down to the 2nd is teleport-protected, but you can get near with +5,+7,+0 and step east. Or go the long way, it's north-east from the entrance. Take the portal leading down to the 2nd level.
- Here, you are outside of a "locked" area, and the assumption would be that Sceadu is somewhere in the middle. He's not, instead, he's on the north side of the north wall. Teleport +10,+7,+0 (go north until you hit the wall, then go east 7 times), and cast PHDO/WAWA on the north wall, this is the only spot to get through. Meet and kill Sceadu. Using the critical hit of a thief is likely the easiest. You get his cloak and helmet. Leave his demens and return to the well worn spot.
- Casts ECEA to return. Go to the old man in the review board. He gives you your next quest; go to Tarmitia and bring him Werra's Shield and the Strifespear. As for every quest completed, you receive 600,000 XP.
Part 7: Tarmitia
- Directly south of Skara Brae (2S 5W) is the Vale of Lost Warriors. Cast AECE to teleport. Tarmitia is the plane of war, ruled by Werra. There are 9 separate maps here, 8 famous places of historical wars, and the final Tarmitia. In each location, you will find a ghostly death-head asking the question "Who am I?". The names are all various gods of war or related terms. Once the correct name is given, a new name is whispered. There is no penalty for giving the wrong name. You can also find teleports to the other locations.
As the answers form a circle, you can skip all locations by immediately answering "TYR" in Berlin, after which you are asked the god's true name, which is "WERRA". This teleports you to the final map (Tarmitia).
- From Tarmitia, there's no teleport back. The random encounters will be from all other 8 maps. From the starting square you can teleport to Werra with -11,+0,+0, or go the long way, he's at the south-west corner.
- Werra tells you that he already gave the Strifespear to Hawkslayer. He has 5000 HP, very low AC and most spells will bounce off him, so your best bet is probably the thief's critical hit. Once he's killed, you will face 6 Black Slayers - you can (and should) run from this fight. Go north and pick up the shield and the spear. Teleport or make your way to the north-east corner, where you will be automatically teleported back to the wilderness.
- As you visit the old man, you find him dying. He's also been slain by the Mad God. With his dying breath, he tells you to go to Malefia, the world of EVIL. All the items you've collected are placed in the storage building near the entrance of Skara Brae. The old review board is now deserted, therefore you don't get additional XP for completing this quest. To level up, you have to visit the Wizard's Guild in Arboria, Lucencia or Tenebrosia.
Part 8: Malefia
- Malefia is the home of Tarjan, the Mad God. He imprisoned the 6 gods, and your first task will be to free them. You will need the 6 named items you previously collected. It doesn't matter if you equip them or not, and using them (later) won't remove them from your inventory.
- In the wilderness, go to the Sulfur Springs (11S 3E): "Foul, noxious gases reaking(SIC) of rotten eggs, bubble up through the turgid, yellow, mud-laden waters." Cast EVIL to teleport to Malefia.
- You arrive in the final location, which consists of 3 large dungeons (which make a continuous mega-dungeon due to teleporters in the south-east/south-west corners) and the 4th small one. You cannot use the teleport spell or phase door anywhere.
- As soon as you enter, you find Hawkslayer's corpse and the Strifespear (Werra's weapon). Pick it up. You will need to find the "statues" of the 6 defeated gods, and use their named items. Mapping the dungeons is not trivial, so the shortest path is given below (although the 6 statues can be opened in any order):
- From Hawkslayer: 7N 5E (teleport) W 2S 2W 2N W S 2W - you arrive at Sceadu's statue. It's Sceadu himself, encased in black ice. Use Sceadu's Cloak; it appears that only a rogue can do this. The statue fades to nothingness (Sceadu is freed), and you get one line of a poem (which will contain hints about the final fight).
- 2E N W N 2E N 2E S E (teleport) 2N W N 3W N 2E - down - N 3W 2S 2E S E - you are at Ferofist's statue, use his helm to free him.
- 2W N W 2N 3E S - up - 2W S 3E S E 2S W (teleport) N 2W S 2W S 2E 2S - up - N 3W N 3W - up - 2E 2S E S 2E 2S 2E 2S 2E 2S - down - 3N W N 2W - finally you're at Valarian's statue. Use his bow.
- 2E S E 3S - up - 2N 2W 2N 2W 2N 2W N W 2N 2W - down - S 2W N - up - S 2E 3S 2E 5S W S 2W 2N E N 2W S W N W - down - 2S E - here's Lanatir. Use his bow. Two more statues left!
- N 5E 4N 6W N W 2N W N 3E - up - 9W 5S E N 3E S W - Alliria's statue is here. Use her belt. Now for the final statue.
- E N W - down - 2W 3S E 3S W 3S 3E S 2E S 5E S - down - S E N - It's Werra's statue. Use's Werra's Shield. The final statue fades away, and you're given another line of the poem. Here it is in it's entirety:
He cannot be defeated by what he can see.
To oppose the usurper's usurpers.
Legions horrid and vast.
He opens the gates of hell.
Hold his allies at bay.
It can be stolen from the jaws of defeat. The way is open for the new generation.
This is in the order of the gods visited, although the order is a bit unclear since the poem doesn't rhyme. The most important takeaway is the first line, and this is mentioned in the clue book as well: you should use the rogue's attack-from-the-shadows critical hit feature.
Once all 6 gods are freed, nothing immediately visible happens. However, if you've been mapping the 3 levels carefully, you should notice that on the 3rd level, there's an area with no entrance. You can now go there!
- Go S W 4N to enter. The last four big fights are coming up, be sure to save before them and be well prepared.
- First, you interrupt a religious ceremony. The High Priestess has 15,000 HP and the 20 Black Slayers have 4,000 HP each.
- Head to the middle, where you will find Redbeard (20,000 HP) and his minions (including 10 Vortexes with 12,000 HP each).
- Step into the final square, where the floor dissipates and the party falls through a field of stars. You are in Tarjan's lair. If you take a step to the south, you have one final chance to teleport back to Skara Brae (for leveling up, more preparation, etc); but beware, you will have to traverse the levels again including the last two boss fights. Walk to the middle, you'll find yourself in a square where "you feel the power pulsing like a heartbeat. You are very close to the source of all evil!" Cast PHDO or WAWA on the south facing wall and enter the final two battles.
- Tarjan sends his minions at you first: 30 Rock Demons, 30 Black Slayers, 2 High Priestess and 1 Lorini. Even Tarjan is surprised if you survive.
- The final fight commences: 30 Rock Demons, 30 Black Slayers, 30 Vampire Lords and Tarjan himself. Tarjan only has 500 HP, but he should be impossible to hit by any melee attack or spell, so the thief's critical hit should take him out.
- If you manage to win this fight as well, congratulations: watch the end sequence!
|
| |
|  Cheats - How do I use cheats? Cheats - How do I use cheats? | >3E1C FF
| 4 billion gold (enter in emulator monitor) |
>3E10 FF FF FF FF FF
>3E90 FF FF FF FF FF
>3F10 FF FF FF FF FF
>3F90 FF FF FF FF FF
>BF10 FF FF FF FF FF
>BF90 FF FF FF FF FF
>1F90 FF FF FF FF FF
| Maximum character stats (enter in emulator monitor) |
F B760 B81F 0
| Kill all current enemies (mid fight) (enter in emulator monitor) |
>100 08 8E 20 01 8C 22 01 8D
>108 24 01 A2 3E 20 29 01 E8
>110 20 29 01 A2 BF 20 29 01
>118 A2 1F A9 80 20 30 01 A2
>120 00 A0 00 A9 00 28 4C C5
>128 85 A9 00 20 30 01 A9 80
>130 85 E0 86 E1 A9 00 A0 2D
>138 91 E0 A0 23 20 41 01 A0
>140 27 20 47 01 C8 C8 C8 B1
>148 E0 88 88 91 E0 60
>458 0 1
| Invulnerability and unlimited spell points (enter in emulator monitor) |
| |
Copyright © Plus/4 World Team, 2001-2025. Support Plus/4 World on Patreon |